How to Make Text Continue Into Seperate Column Excel
Separating Text in Excel
The texts in Excel can appear in different ways. For example, maybe there is a text joined by some symbol, or it is like a first name and the last name.
At some point in our life, we will want those texts separated. The problem statement is explained above that we will come towards some data where we need to separate those texts from one another. But how do we separate those texts from one another? There is one very basic way to do it: copy the desired text in each selected individual cell. Else, we can use some pre-given Excel tools to perform.
Table of contents
- Separating Text in Excel
- How to Separate Text in Excel?
- Example #1 – Delimiter Method to Separate Text
- Example #2 – Using the Fixed Width Method to Separate Text
- Example #3 – Using Formulas for Separating Text
- Things to Remember in Separating Text in Excel (text to column & formula)
- Recommended Articles
- How to Separate Text in Excel?
How to Separate Text in Excel?
There are two methods to separate Texts in Excel:
- Using "Text to Columns in Excel Text to columns in excel is used to separate text in different columns based on some delimited or fixed width. This is done either by using a delimiter such as a comma, space or hyphen, or using fixed defined width to separate a text in the adjacent columns. read more ": It further has its own two bifurcations:
- Delimited: This feature splits the text, which is joined by characters, commas, tabs, spaces, semicolons, or any other character such as a hyphen (-).
- Fixed Width: This feature splits the text, which is joined with spaces with a certain width.
- Using Excel Formulas: We can use formulas like the Len in excel The Len function returns the length of a given string. It calculates the number of characters in a given string as input. It is a text function in Excel as well as an inbuilt function that can be accessed by typing =LEN( and entering a string as input. read more to calculate the length of the string and separate the values by knowing the position of the characters
Let us learn these methods using examples.
You can download this Separate Text Excel Template here – Separate Text Excel Template
Example #1 – Delimiter Method to Separate Text
First, where do we find this feature text to columns in Excel? It is under the "Data" tab in the "Data Tools" section.
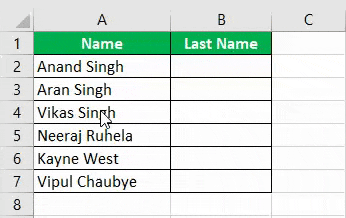
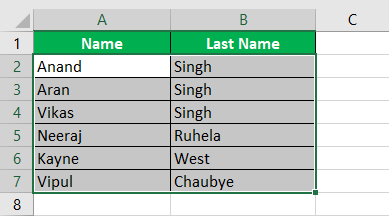
Consider the following data,
We want to separate the first and last names. Therefore, the last names' content is in the B column.
Below are the steps of separating text in excel –
- First, we must select the column containing the data, A column.
- Under the "Data" tab in the "Data Tools" section, click on "Text to Columns."

- A dialog box appears for text to columns wizard.
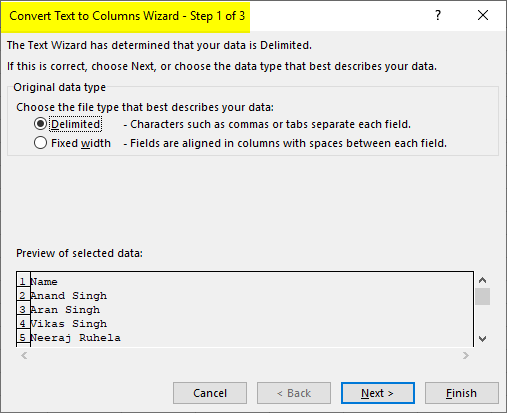
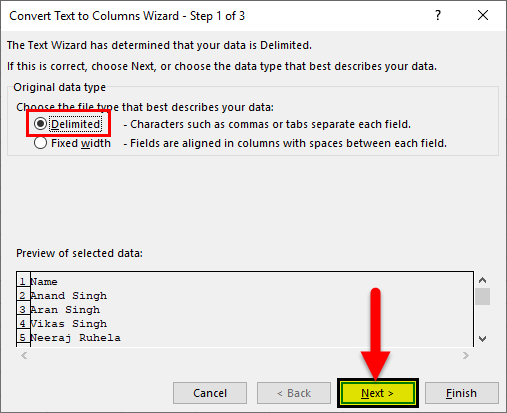
- As we will use the delimiter method first, select the "Delimited" option and click on "Next." Another dialog box appears.
- Our texts are separated in Excel by spaces for the current data, so select the "Space" option as a "delimiter" ( By default, Excel selects a tab as a delimiter). Then, finally, click on "Next."
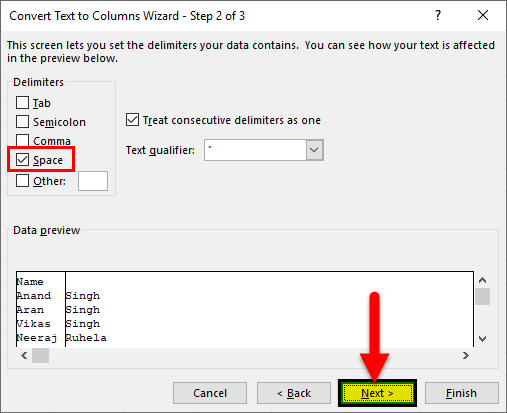
- Our "Data preview" shows that our texts are separated with first and last names. Click on "Finish" to see the result.
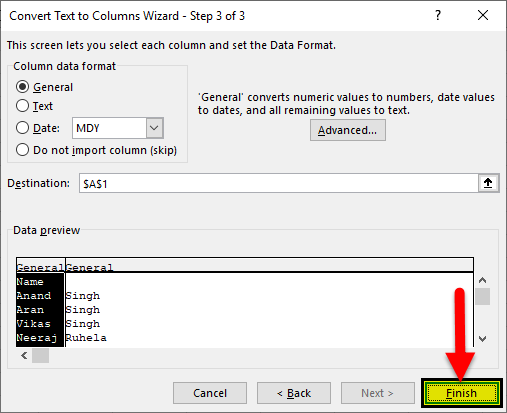
- We have successfully separated our Excel text by using the text-to-column delimiter method.
Example #2 – Using the Fixed Width Method to Separate Text
We already know where the option of text to the column is in Excel. It is in the "Data" tab under the "Data Tools" section.
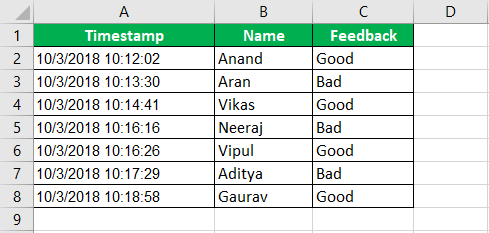
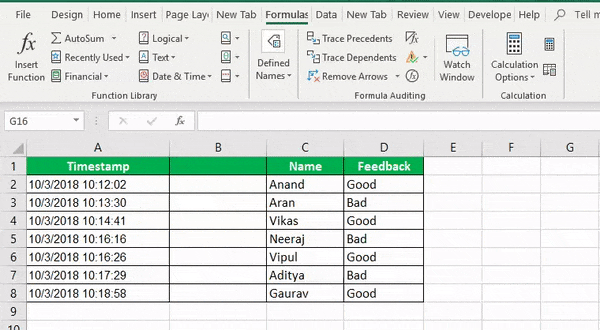
Now we consider the following data,
There is a survey company that is surveying for the feedback of a restaurant. The users give their feedback as "Good" or "Bad." But every response is saved by a timestamp, which means with every response, time is recorded, specific data and time in hours and minutes.
We need to separate the date from the time in the data. Below is the data.
Step #1 – We need to separate the contents of column A, but there is data in column B, so we need to insert another column between columns A and B. Select column B and press the "CTRL + +" keys for that.
It adds another column between the columns and shifts the data from previous column B to column C.
Step #2 –Now, select the data in column A. Click on "Text to Columns" under the "Data" tab in the "Data Tools" section.
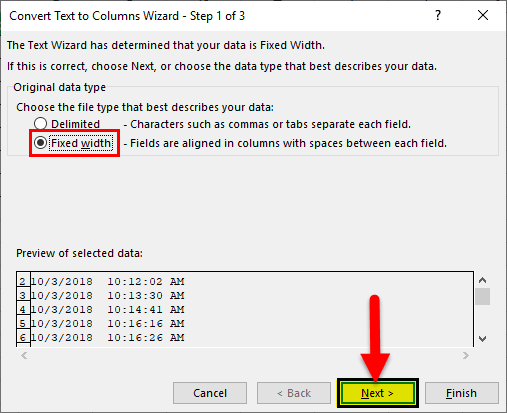
A dialog box appears for converting text to columns wizard.
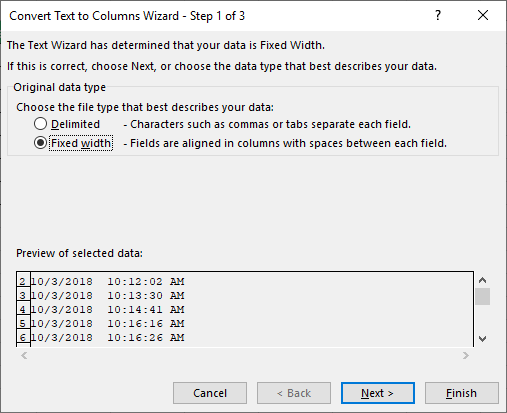
Step #3 –This time, we use a fixed width method. So ensure that the "Fixed width" method option is selected and click on "Next." Another "Convert Text to Column Wizard" dialog box appears.
Step #4 –In the "Data preview," we can see that the data is separated into three parts: date, time, and the meridian, AM, and PM.
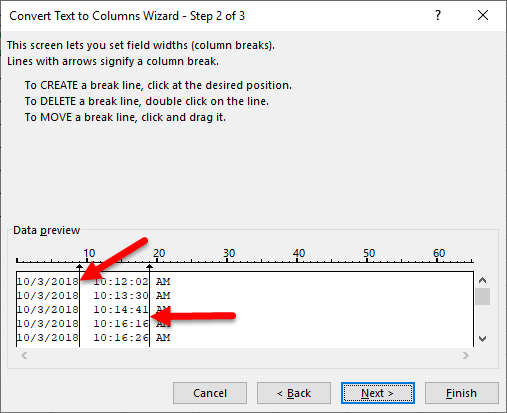
We need only date and time, so hover the mouse around the second line and double click on it, and it disappears.
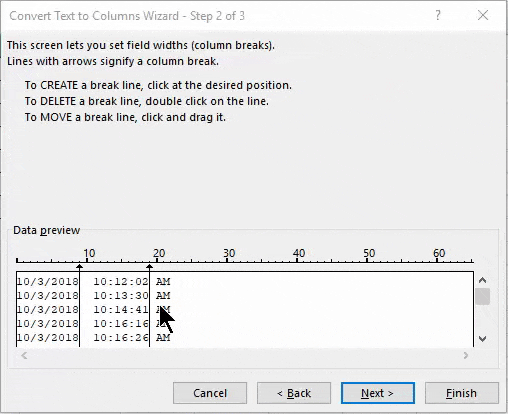
Step #5 –Now, click "Next." Another "Convert Text to Columns Wizard" dialog box appears. Then, you need to click on the "Finish" button.

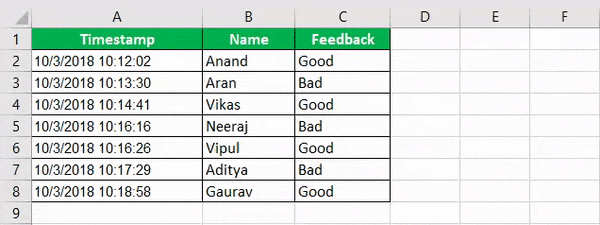
Now, the data is separated with date in one column and time in another.
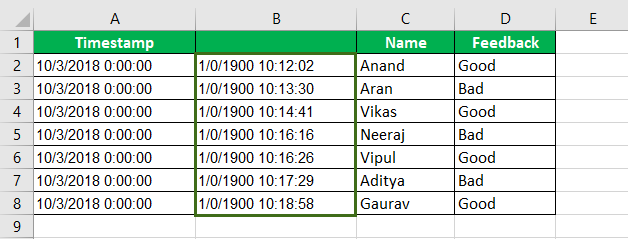
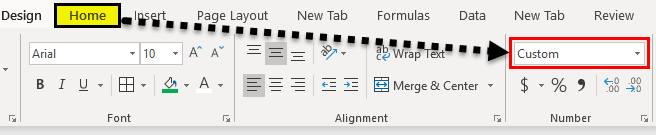
Step #6 –The data formatting in column B is incorrect, so we must rectify it. Select the contents on column B, and in the "Home" tab under the "Number" section, the default selection is "Custom." We need to change it to "Time."
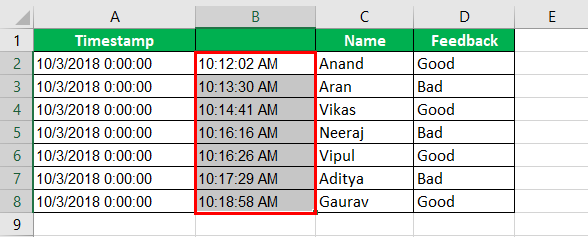
Step #7 –We have successfully separated our Excel data using the "Text to Columns Fixed Width" method.
Example #3 – Using Formulas for Separating Text
We can also use Excel formulas to separate the text and numbers, which are joined together. Then, we can remove that data by using "Text to Columns." However, we use formulas for complex situations.
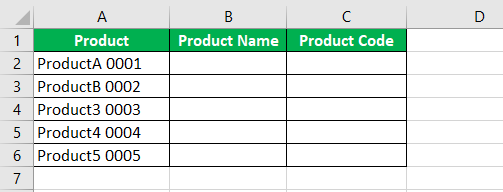
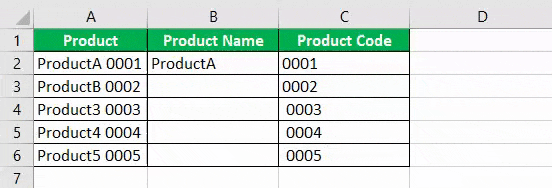
Let us consider the following Data:

We have products in column A with their respective product codes. We need products in one column and product code in another. We want to use formulas to do this.
Step #1- To this, we must first count the number of digits and separate that number from the character.
Step #2- We need the "Product Name" in column B and "Product Code" in column C.
Step #3- First, we will separate the digits to separate the text in Excel from the data. In C2, write the following Excel formula to separate text.
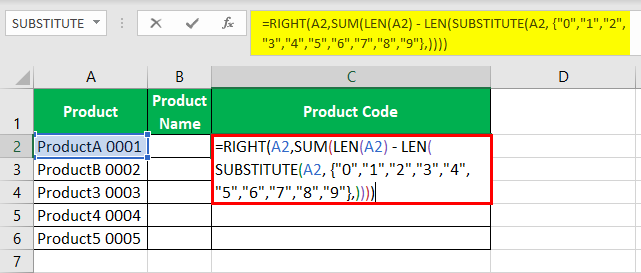
We use the right to function as we know the numbers are in the right.
Step #4- Now, in Cell B2, write the following Formula,
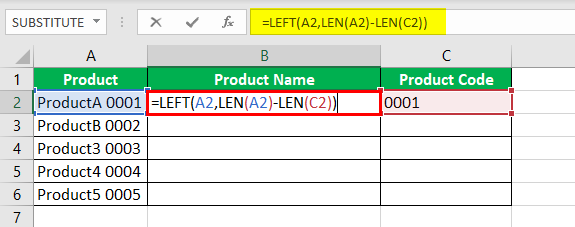
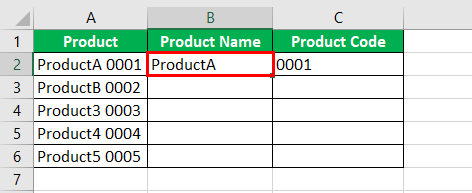
Step #5- Press the "Enter" key. Using the LEN function, we have successfully separated our data from "Product Name" and " Product Code."
Step #6- Drag the formulas to cells B6 and C6, respectively.
Things to Remember in Separating Text in Excel (text to column & formula)
- If we use the "Text to Columns" method, always ensure that we have an additional column so that the data in any column does not get replaced.
- We must ensure the characters' positioning if we separate texts in Excel using Excel formulas.
Recommended Articles
This article is a guide to Separate Text in Excel. Here, we discuss how to separate text in Excel using two methods: 1) Text to Columns (delimited and fixed width), and 2) Excel formulas with practical examples and a downloadable template. You may learn more about Excel from the following articles: –
- Date to Text in Excel You can convert Date to Text in Excel through the most commonly used method, i.e., the text function or by using: Text-to-Column option, Copy Paste Method and VBA. read more
- Convert Date to Text in Excel To convert a date to text in Excel, right-click on the date cell and select the format cells option. A new window will open. You can convert the date to text by selecting the desired format from a list of options. read more
- Numbers to Text in Excel with Examples You may need to convert numbers to text in Excel for a variety of reasons. If you use Excel spreadsheets to store long and not-so-long numbers, or if you don't want the numbers in the cells to be involved in calculating, or if you want to display leading zeros in numbers in cells, you'll need to convert them to text at some point. It's useful for displaying numbers in a more readable format or combining numbers with text or symbols. The methods listed below can be used to accomplish this. read more
- Top Excel Keyword Shortcuts
freemanbrourcomis.blogspot.com
Source: https://www.wallstreetmojo.com/separate-text-in-excel/
0 Response to "How to Make Text Continue Into Seperate Column Excel"
Post a Comment